Showing posts with label Healthy. Show all posts

Wednesday, May 25, 2011

Quick Chicken and Rice Soup

This is a delicious soup recipe!
It is a very simple recipe and simple soup,
but sometimes that is all you want for dinner or lunch.
This recipe is so easy to make, and cooks up very quickly.
You can use leftover chicken, rotisserie chicken, or pre-cook your chicken to make the cooking time even quicker. You can also precook the rice too.
The fresh lemon juice and chives really make this soup stand out.
Serve with your favorite muffin or bread along side a green salad and you have a perfect meal.
Enjoy!


Quick Chicken and Rice Soup

What you Need:

8 C chicken broth

2 C chicken, shredded

2-3 stalks of celery, sliced

2-3 carrots, sliced

1 C instant rice or 1 – 2 C cooked rice

1/2 C chives, chopped

Juice of 1/2 lemon

salt and pepper to taste


How To Make:

Add together broth, celery and carrots. Bring to boil and simmer for about 5 minutes or until vegetables are tender. If using minute rice, add in rice and simmer for 5 minutes. If using cooked rice just add along with chives and lemon juice. Enjoy!!


Recipe Source: Your Home Based Mom

Monday, May 23, 2011

Shrimp, Broccoli, and Sun-Dried Tomatoes with Pasta

This is a perfect combination of Pasta, Shrimp, and Broccoli, all in a light cream sauce.
The sauce is made with light cream cheese and chicken broth instead of using heaving whipping cream.
That is what makes this meal guiltfree and So Good.
I found this tasty recipe in the Jillian Michaels book, 'Making the Cut'.
This meal was a hit at our house and I will make this recipe again for sure!
I served it with Breadsticks, and purple grapes.
Enjoy.


Shrimp, Broccoli, and Sun-Dried Tomatoes with Pasta
Serves 4

What You Need:
-1/2 cup Sun-Dried tomatoes, packed in oil
-4 cups uncooked farfalle (Bow tie pasta)
-2 cups of chopped fresh broccoli
-cooking spray
-1 garlic cloves, minced
-1 pound shrimp, peeled and deveined
-1/2 cups fat-free, low-sodium chicken broth
-1/2 cup fat-free or low-fat cream cheese
-1/2 teaspoon dried basil
-1/4 cup Parmesan cheese
-1/2 lemon, juiced

How to Make:
1. Rinse really well the Sun-Dried tomatoes so all the oil is off, dice the tomatoes and then set aside.
2. Cook Pasta according to Package, do not add any salt or fat. When pasta is done, drain and then set aside.
3. Steam broccoli, covered for about 3 minutes or until tender crisp. Set aside.
4. Heat a large nonstick skillet over medium-high heat. Coat pan with cooking spray. Add garlic and shrimp to the pan. Cook 4 minutes or until the shrimp is pink and done.
5. Add broth and cream cheese, stirring until combined, bring to a boil. Reduce heat and simmer for about 2 minutes.
6. Add tomatoes, broccoli, and basil; stir well. Cook 2 minutes or until thoroughly heated through. Stir Frequently.
7. Remove from heat. Stir in pasta, Parmesan, and lemon juice.
Serve Immediately!

Source: Jillian Michaels, Making the cut

Thursday, April 14, 2011

Turkey Sliders

This is a healthier way to make sliders.
I love the red onion, cilantro,and cumin mixed in the turkey. It makes the Sliders very flavorful and simply delicous!
This meal was also very easy to throw together.
I used a indoor grill pan, but when the weather is warmer I use our outdoor grill.
My boys loved the Sliders! Something about food being in mini form, makes it just that much better!


Turkey Sliders
makes 10-12 sliders

What you Need:
-1 egg white, beaten
-1/2 cup red onion, minced
-1/4 cup fresh cilantro, minced
-1/2 teaspoon ground cumin
-1/4 teaspoon of salt
-1 pound of Ground Turkey
- 12 dinner rolls, whole wheat
-lettuce leaves, halved
-Plum Tomatoes, sliced
-1 avocado, sliced

How To Make:
1. Whisk together the egg white, onion, cilantro, cumin, and salt in a medium bowl. Add the turkey and mix until just blended. Shape into 10-12 burgers.

2. Heat a skillet coated with cooking spray over medium heat. Cook the burgers, turning once, for 6 minutes or until done.

3. Place the bottoms of the dinner rolls on plates. Top with one 1 piece of lettuce and 1 tomato slice. Place 1 burger on each and top with the avocado and top of the roll.

Enjoy!

Source: Flat Belly Cookbook

Sunday, April 10, 2011

Baja Style Shrimp Tacos

These Tacos are Amazingly Good!
If you can't have the real California Baja style tacos, make your own.
We had our first day of 70 degree weather today, the warm weather made me crave something more light and healthy to eat.
These Baja Shrimp Tacos hit the spot.
As far as prep goes, these really don't take a whole lot of time to make. I started by getting the shrimp ready and then marinating them in the lime and oil while making the beans, quacamole, and pico de gallo. The shrimp cooks so quickly, so I did not cook them until right before I was ready to serve the dinner.


Baja Style Shrimp Tacos
serves 4 -6
  • 2 pounds medium shrimp, peeled and deveined
  • 2 tablespoons olive oil
  • the juice of one lime
  • 1 teaspoon coarse salt
  • 1 dozen corn or whole wheat tortillas
  • pico de gallo (recipe below)
  • black beans (recipe below)
  • guacamole (recipe below)
  • lime wedges for serving
  • Cholula hot sauce (or your favorite hot sauce)
  • monterey jack cheese (optional)

1. Toss the shrimp together with the olive oil, lime juice and salt. Preheat your grill (outdoor or indoor) over high heat. Grill until cooked through, about 2 minutes a side.

2. To serve, heat the tortillas in a dry frying pan and wrap them in a towel to keep warm. Pile a few shrimp on top of each tortilla and serve with a bit of pico de gallo, back beans, guacamole, fresh lime juice, a few dashes of hot sauce and a little of the cheese if you’d like.

Yummy!


Pico de Gallo

Simple to prepare and about a thousand times fresher and more vibrant than any jar of salsa.

  • 1 pint grape tomatoes, quartered
  • 2 tablespoons roughly chopped cilantro leaves
  • 3 tablespoons finely chopped white onion
  • coarse salt
  • squeeze of lime
  • as many finely chopped red jalapeños as you’d like (optional)

Combine the tomatoes, cilantro and onion together in a bowl. Season to taste with salt and lime. Reserve some of this mixture for the kids, and then add as much jalapeño as you like to the remaining mixture for the adults.


Black Beans

  • 1 can of black beans
  • 4 cilantro stems
  • 1 garlic clove, crushed
  • pinch of salt

Combine everything together in a small pot and simmer over low heat for about 15-20 minutes (I do this while I’m preparing the rest of the meal). Be sure to simmer the beans long enough so that they’re not watery.


Guacamole

  • 2 ripe avocados
  • 2 tablespoons minced white onion
  • 3 tablespoons cilantro leaves, roughly chopped
  • 1 lime
  • coarse salt

Cut each avocado in half, remove and reserve the pits and score the flesh inside of the shells. Scoop the avocado into a mixing bowl and mash gently with a fork—you don’t want it to be completely smooth. Stir in the onion and cilantro. Cut the lime in half and squeeze in enough juice to taste. Season the guacamole with salt, and either serve immediately or stick the pits in to keep it from browning (remove the pits before serving).

Recipe Source: GOOP

Saturday, April 9, 2011

Kansas City Chicken on Baked Brown Rice

A simply tasty and healthy meal!
The chicken cooks to be very moist in the crock-pot or slow-cooker and will shred really easily when done.
The best I can describe the sauce is a sweet but yet light BBQ taste. Really yummy, my two picky little boys even loved it!
A slow-cooker meal is perfect for those busy days.
Serve on top of my 'Favorite way' to cook brown rice (Baked Brown Rice).
Then add a green salad or vegie to round out the meal. Yum!


Kansas City Chicken (slow cooker)
on Baked Brown Rice

What you Need:

5 boneless, skinless chicken breasts
2 tablespoons olive oil
1/4 cup ketchup
1/2 cup apple cider vinegar
1/2 cup granulated sugar
1 onion, diced
1 tablespoon soy sauce
1/2 teaspoon dry mustard
1 cup low-sodium beef broth

How to make:

In a large skillet, heat the olive oil. Season the chicken breasts with salt and pepper and cook them for 1-2 minutes on each side, until nicely browned but not cooked all the way through. Remove the chicken to the slow cooker. In a large bowl, combine all the other ingredients. Whisk well. Pour the sauce over the chicken. Cover the crockpot and cook on low for 6 hours. Serve on top of Baked Brown Rice.

Baked Brown Rice:

Makes about 3 1/2 cups cooked rice

1 1/2 cups brown rice
2 1/2 cups low-sodium chicken broth or water (if using water, add 1 teaspoon salt)

Preheat the oven to 350 degrees.
Lightly grease an 8X8-inch or 9X9-inch baking pan. Place the rice in the prepared pan and pour in the liquid. Stir to equally distribute the rice. Cover tightly with a double layer of aluminum foil and bake for 1 hour and 10 minutes. Remove from the oven and let sit for five minutes before removing the aluminum foil and fluffing with a fork. If your rice still has a bit of liquid on the bottom or conversely, if it is dried out, adjust the baking time up or down to make changes.

Recipe Source: adapted from My Kitchen Cafe

Thursday, November 11, 2010

Steak Bites

The three boys in our house LOVE steak, and are always asking for it!
I don't cook it often because of the cost, and my lack of love for steak.
However, when I cook this recipe the Steak bites are gone very quickly.
Having steak cooked in bite sizes is a a fun and different way to serve steak, and also makes dinner cooking time quicker.
Serve with your favorite sides and enjoy!


Steak Bites

What You Need:

-1 sirloin steak

or

-1 pkg. pre-cut beef tips

-Kosher salt and freshly ground black pepper

-Butter


How To Make:

1. Trim off the large obvious pieces of fat that run along the side of the meat. Cut strips less than 1 inch wide. Cut into small bite-sized pieces. If you see anymore large chunks of fat, gristle or long silvery membranes cut them off.

2. Sprinkle generously with kosher salt and freshly ground black pepper. Toss the meat around a bit to thoroughly coat with the seasonings.

3. Heat the skillet over medium high to high heat. As the pan heats, add about 2 tablespoons butter to the skillet. Allow the butter to melt, then brown, before you add the meat.

4. Place some of the meat in the pan in a single layer. It should sizzle loudly when it hits the pan – if it doesn’t, the pan isn’t hot enough. Don’t stir or disrupt the meat for 30 to 45 seconds. You want it to sizzle and brown on one side. Now scoop as many steak bites as you can with your spatula and flip them over. Repeat until all the meat is turned. Cook for an additional 30 seconds or so – just long enough to sear the outside of the meat but NOT completley cook the inside, or in will be over-done.

5. Remove the meat to a clean plate. Add a little more butter to the pan and repeat the cooking process with the next batch just as before. Lastly when all the meat is nicely browned and removed to the plate pour all that browned/blackened butter and drippings all over the meat.

Serve with Vegies, potatoes, or any other side.

Enjoy!

Friday, October 1, 2010

Italian Chicken, Mushrooms, Spinach and Linguine

This is one of my favorite Italian dishes!
It is very easy to make and tastes like you ordered a dish from a good Italian restaurant.
My husband loves it, and asks for it regularly. My two boys like it after they pick out the mushrooms and give them to my husband and I.
I like to serve the dish with fresh french bread.
So good.
Enjoy!


Italian Chicken, Mushrooms, Spinach and Linguine
serves 6

What You Need:
-1 1/2 cups of sliced mushrooms (any variety)
-1 tablespoon olive oil
-1/4 cup finely minced shallots
-1 teaspoon fresh thyme or 1/4 teaspoon dried thyme
-2 cloves garlic, minced
-1/4 teaspoon salt
-6 chicken breasts (about 2 pounds)
-salt and ground pepper
-3/4 cups purchased pesto or homemade
-6 sliced of Mozzarella cheese
-1 10 oz. package fresh spinach
-1 box of Linguine pasta

How to Make:
1. Preheat oven to 350.
2. In a medium skillet cook mushrooms in hot oil over medium heat for 3 to 5 minutes or until tender, stirring occasionally. Add shallots, thyme, garlic, and 1/4 teaspoon salt; cook and stir for 1 minute more. Remove form heat.
3. Sprinkle chicken lightly with salt and pepper. Place in a baking pan. Spread chicken with pesto; top with mushroom mixture.
4. Bake for 30 to 35 minutes or until chicken is no longer pink. Top with cheese. Bake for 3 -5 minutes more until cheese is melted.
5. To serve, arrange chicken and mushrooms on a bed of spinach and a side of cooked linguine. Drizzle left- over sauce onto linguine.

Source: Adapted from Better Homes and Gardens
-

Sunday, September 19, 2010

French Bread Rolls

I love these Rolls!
They are so easy to make and always turn out.
I use the dough to make dinner rolls, hamburger buns, sub rolls, and pizza dough.
They are my 'go to' easy roll recipe.
Using the bread flour makes them a little more chewy and soft, however I have used all-purpose four and they turn out yummy as well.
My family LOVES when I make these yummy rolls,
they don't last long in our home.
Enjoy!


French Bread Rolls

Makes about 1 dozen rolls

What you need:
-1 1/2 cups warm water (110 degrees F/45 degrees C)
-1 tablespoon active dry yeast
-2 tablespoons white sugar
-2 tablespoons vegetable oil
-1 teaspoon salt
-4 cups of bread flour or all-purpose flour


How to make:
1. In a large bowl, stir together warm water, yeast, and sugar. Let stand until creamy, about 10 minutes.

2. To the yeast mixture, add the oil, salt, and 2 cups flour. Stir in the remaining flour, 1/2 cup at a time, until the dough has pulled away from the sides of the bowl.

3. Turn out onto a lightly floured surface, and knead until smooth and elastic, about 8 minutes.
(I use my Kitchen Aid mixer with the bread hook for 8 minutes to knead)

4. Lightly oil a large bowl, place the dough in the bowl, and turn to coat. Cover with a damp cloth, and let rise in a warm place until doubled in volume, about 1 hour.

5. Deflate the dough, and turn it out onto a lightly floured surface. Divide the dough into 12-14 equal pieces, and form into round balls. Place on lightly greased baking sheets at least 2 inches apart. (I like to brush on with a pastry brush an egg white and water mixture on the top of the dough, 1 egg white and 2 tablespoons of water mixed)
Cover the rolls with a damp cloth (or greased saran wrap), and let rise until doubled in volume, about 40 minutes. Meanwhile, preheat oven to 400 degrees F (200 degrees C).

6. Bake for 12-13 minutes in the preheated oven, or until golden brown.


Source: Adapted from allrecipes.com & My Kitchen Cafe

Sunday, June 27, 2010

Island Chicken

This is a very healthy and refreshing marinade for chicken.
You can either cook the chicken in the oven or grill depending on how you feel. Either way, the chicken is delicious!
This has become a staple marinade at our house and perfect for a summer meal.
You can serve it with what ever sides your family likes!
Enjoy.


Island Chicken

Ingredients:
½ cup vegetable oil
3 tbsp. lemon juice
1½ tbsp. soy sauce
1 clove garlic, minced or pressed
½ tsp. dried oregano
¼ tsp. salt
Freshly ground black pepper
2-4 chicken breasts


How to Make:
1. Combine all ingredients except chicken in a mixing bowl or large airtight plastic bag. Whisk or shake well until the marinade is well mixed. Add the chicken breasts to the bowl or plastic bag so that they are covered by the marinade. If using a bowl, cover tightly with plastic wrap. If using a plastic bag, press out all the excess air and seal the bag tightly. Refrigerate and marinate up to 10 hours.

2. When ready to cook the chicken, preheat the oven to 350° F. Place the chicken breasts in a baking dish and pour the excess marinade over them. Bake in the oven until cooked through and the internal temperature reaches 165° F, about 45 minutes (exact baking time will depend on the size of your chicken pieces.) Remove from the oven and let rest for 5 minutes before serving.

OR Preheat a outdoor or indoor grill. When heated cook chicken for about 7 minutes on each side until done.


Recipe Adapted From Annie's Eats

Sunday, June 13, 2010

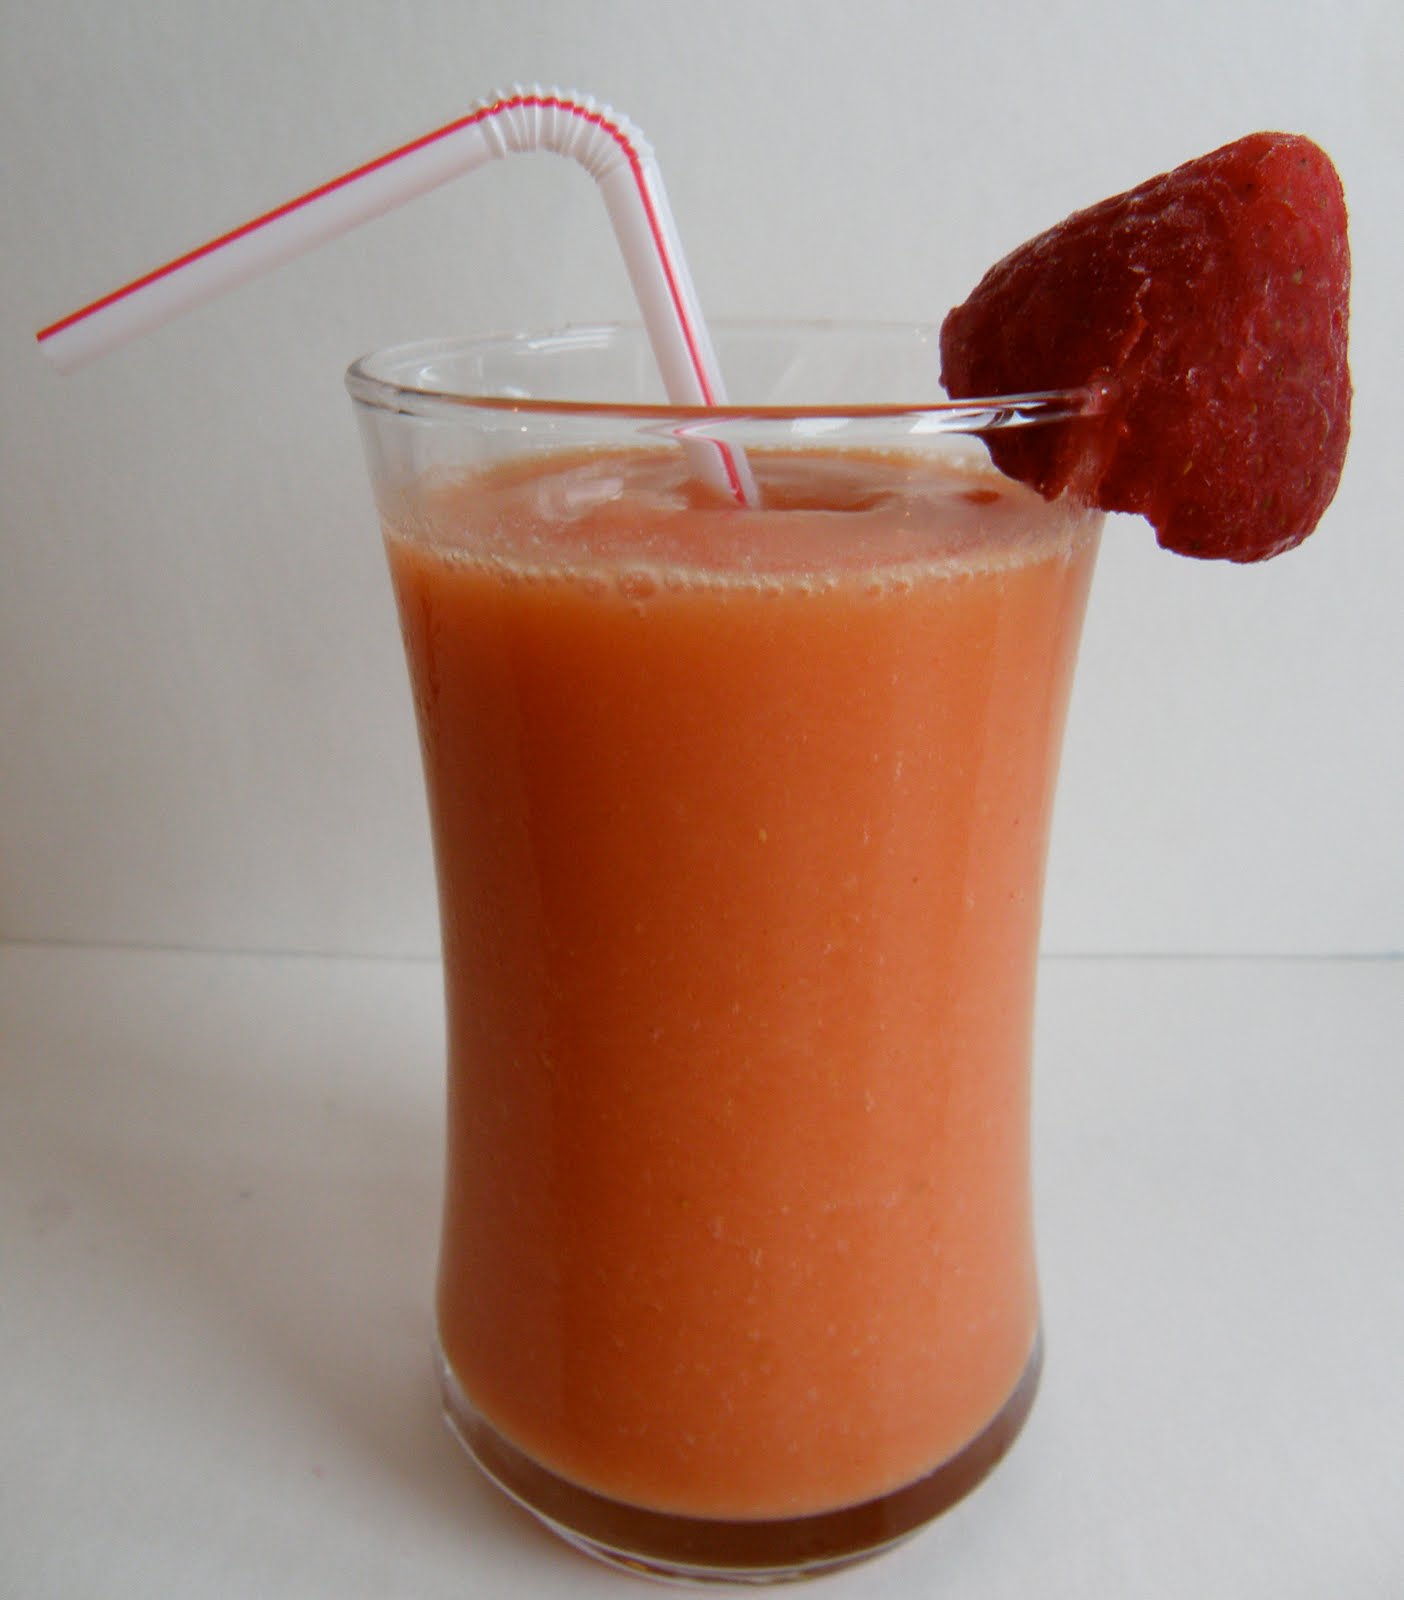
Caribbean Passion Fruit Smoothie

A cold fresh smoothie tastes like summer to me!
This is a favorite smoothie recipe in our home. I usually make two batches of this recipe to feed the four of us. I wouldn't double it in your blender, unless you have a huge blender that can handle that much blending. I find that it mixes better and faster if I just do one batch at a time.
If you live in the west you will know the name Jamba Juice, a smoothie making establishment. This recipe is a copy cat recipe from one of their smoothies.
I hope you are all enjoying your summer and keeping cool in the summer heat!


Caribbean Passion Fruit Smoothie
makes 2 tall cups

What You Need:
-1 cup mango juice
-1/2 cup frozen peaches
-1 cup frozen strawberries
-1/2 cup crushed ice
-1 cup orange sherbet


Add all ingredients to bender and blend. If too thick, add more mango juice.
Serve and Enjoy!

Monday, June 7, 2010

Sloppy Joes

A classic Weeknight meal
that the whole family enjoys!
This is very quick to make and I almost always have the ingredients on hand.
I always use ground turkey in this recipe and love the results.
Napkins are always good to serve with this meal, as it can get messy!


Sloppy Joes

What you Need:
-1 lb. ground beef OR ground turkey
-1 small onion, chopped
-1/2 cup celery
-12 oz tomato sauce
-1/2 cup ketchup
-1 Tbsp brown sugar
-1 teaspoon dry mustard
-1/4 tsp. salt
-1/8 Tbsp Worcestershire sauce
-1 Tbsp. vinegar

How to Make:
1. Brown Beef OR Turkey with onion and celery.
2. Add remaining ingredients.
3. Cover and simmer 20-30 minutes or until most liquid is gone.
4. Serve on toasted buns.

Enjoy!

Monday, May 24, 2010

Tacos Supreme

Tacos are a staple weeknight meal at our home, we have them at least 2 times a month.
I used to buy the Taco seasoning packets at the grocery, but then came across this recipe over on My Kitchen Cafe.
I will never buy the packets again. This recipe is just as easy, taste's so much better, and save's a little bit of money!
We also like to serve the Tacos with Cilantro Mexican Rice.
Enjoy!


Tacos Supreme

Heat in a medium skillet over medium heat:
2 tablespoons Olive Oil

Add:
3/4 cup chopped onion

Cook, stirring often, until softened, 4 to 5 minutes. Increase the heat to medium-high and add:

1 pound ground beef OR ground turkey

Cook, breaking up the meat, until it is no longer pink, about 3 minutes. Stir in:
1 to 3 garlic cloves
1 tablespoon chili powder
2 teaspoons ground cumin
Salt to taste ( about 1/2 to 3/4 teaspoon)

Cook, stirring, for 30 seconds. Add:
1 15 oz. can tomato sauce
Optional: add a few dashes of hot pepper sauce to taste or canned jalapenos OR just leave out the heat altogether.

Cook, stirring occasionally, over low heat for 10 minutes or until there is no more liquid left in the meat mixture.

Serve meat in taco shells (hard or soft) and your choice of toppings.


Source: Adapted from My Kitchen Cafe

Wednesday, May 19, 2010

Easy Chicken Cacciatore

Classic Chicken Cacciatore recipes are usually a all day-long stewed affair, and usually call for the whole chicken.
This recipe is a quick, weeknight dish that gets plenty of flavor from garlic, fresh basil, mushrooms, red pepper, and chicken breasts. But yet still has the yummy flavor of a stewed all day Cacciatore.
We like to serve this dish a long side pasta, or mashed potatoes, and a green salad.
So good!


Easy Chicken Cacciatore

Serves 4


Ingredients:

-4 boneless, skinless chicken breasts (about 1 1/2 pounds)

-salt and pepper

-2 Tablespoons olive oil

-1/2 cup onion, chopped fine

-1 red bell pepper, seeded and chopped

-9 small mushrooms, quartered

-2 garlic cloves, minced

-1 14.5 oz diced tomatoes

-1/4 cup cooking red wine

-1/4 cup minced fresh basil


How To Make:

1. Pat chicken dry with paper towels and season with salt and pepper. Heat oil in large skillet over medium-high heat until just smoking. Cook chicken until golden brown, about 5 minutes per side(the chicken will NOT be cooked through yet). Transfer to plate.

2. Add onion, bell pepper, and mushrooms to skillet and cook until lightly browned, about 8 minutes. Stir in garlic and cook until fragrant, about 30 seconds. Add tomatoes, wine, and browned chicken along with any accumulated juices and bring to boil. Reduce heat to medium and simmer, covered, until chicken is cooked through, 2 to 4 minutes.

3. Transfer chicken to serving platter and tent with foil. Simmer sauce, uncovered, until slightly thickened, about 5 minutes. Off heat, stir in basil and season with salt and pepper. Pour sauce over chicken. Serve.

Garnish with grated Parmesan cheese.

Enjoy!


Source: Adapted from Cook's Country

Monday, May 10, 2010

Lemon Chicken Stir-fry wth Pasta

This is a delicious quick week night meal,
that requires no Oven baking for those warm days ahead.
I loved how this stir-fry is served on top of Angel Hair Pasta instead of the typical rice. If you do not have the pasta you can still serve this on top of rice for great results.
The lemon sauce is very refreshing and light without being over powerful, a perfect complement to the chicken and vegies.
This meal was a hit at our house and will be made many times this summer.


Lemon Chicken Stir-Fry with Pasta
4 servings

Ingredients:
-
8 ounces uncooked angel hair pasta
-1 Tablespoon vegetable oil
-1 pound boneless, skinless chicken breasts or tenders, cut into 1 inch pieces
-1 medium onion, cut into 8 wedges
-2 cups of broccoli flowerets
-1/2 cup sugar snap peas
-1 cup chicken broth
-1 Tablespoon chopped fresh or 1 teaspoon of dried thyme leaves
-1 teaspoon grated lemon peel
-1/4 cup of fresh squeezed lemon juice
-4 teaspoons cornstarch
-1 teaspoon lemon pepper seasoning
-1 cup cherry or grape tomatoes, cut in half

How to Make:
1-Cook and drain pasta as directed on package.

2-While pasta is cooking, heat oil in a skillet over medium high-heat. Add chicken and onion; stir-fry 6-8 minutes or until chicken is slightly browned and cooked through.

3-Add broccoli and pea pods to chicken mixture. Cook over medium -high heat for 4 -5 minutes, stirring frequently, until vegies are crisp-tender.

4-In a mixing bowl combine, chicken broth, thyme, lemon peel, lemon juice, cornstarch, and lemon pepper. Stir suace into the chicken and vegie mixture in the skillet. Cook over medium heat for 1 -2 minutes or until suace is thickened and vegies are coated.

5-Stir in tomatoes: cook until thoroughly heated. Serve over pasta.


Enjoy!

Thursday, April 15, 2010

Spinach and Feta Stuffed Chicken Breasts

This chicken is Delicious!
The creamy spinach and cheese filling is very good and so easy to make.
This is also a very Healthy meal when you use low-fat or fat-free feta and ricotta cheese. I also used Italian seasoned whole wheat bread crumbs that made the Chicken taste even better.
I served this chicken with steamed broccoli and rolls.

Spinach and Feta Stuffed Chicken Breasts
makes 4-6 servings


What you need:
-10 oz package frozen chopped spinach, thawed and juice squeezed out OR 4 cups of fresh chopped spinach
-1 tsp olive oil
-1/2 cup (2.5 oz) low fat Feta cheese
-1/3 cup low fat ricotta cheese
-1/4 cup chopped parsley
-1/4 cup chopped scallions
-1/2 onion, chopped
-2 cloves garlic
-salt and pepper
-3 (1.25 lbs) chicken breast halves
-1 egg
-1 tbsp water
-1/2 cup seasoned breadcrumbs (I used whole grain Italian seasoned breadcrumbs)
-spray oil

How to Make:
1. In a small sauté pan, heat oil. Add onions, garlic and scallions and sauté about 1 minute. Add spinach and parsley, salt and pepper and cook another minute. Remove from heat, add feta and ricotta cheese.

2. Preheat oven to 350°.

3. Slice chicken breast halves in half length wise so they will be thin cutlets. Pound them to make them thinner. This helps when you wrap the cutlets. Season chicken with salt and pepper.

4. Place just under 1/4 cup of spinach mixture in the center of the chicken. Roll it and secure the ends with toothpicks to prevent filling from coming out ( I actually did not use toothpicks, I just rolled the chicken and let the sides of the roll stay open, and it turned out great). It's ok if it's not perfect. The egg wash and breadcrumbs keep everything in place.

5. Dip chicken into egg wash, then breadcrumbs.

6. Spray cookie sheet with oil and place chicken on cookie sheet. Lightly spray chicken with oil and bake about 25- 30 minutes, until cooked through. Remove toothpicks and serve.

ENJOY!

Source: Adapted from Gina's WW Recipes

Tuesday, April 13, 2010

Chicken Artichoke Pesto Calzones


These Calzones are Amazingly Good!
The pizza dough recipe that I used to make these Calzones made the meal as good as if we were eating at a pizzeria.
I served the Calzones with warm (pre-made) Alfredo sauce for dipping, and a green salad.
For my two little boys I made them their own mini cheese pizzas, they are not into Artichoke and Pesto yet.
Once you get your pizza dough made, they really do not take long at all to make. I do have to say though making your own pizza dough from scratch is well worth with effort.


Chicken Artichoke Pesto Calzones
Serves 8

2½ pounds pizza dough (you can use your favorite pizza dough OR the recipe I use I have at the bottom of this post)

1 cup pesto
1 cup frozen artichokes, defrosted and roughly chopped
2 cups shredded cooked chicken
2 cups (8 ounces) shredded mozzarella or fontina cheese
olive oil for brushing

1. Heat the oven to 500 degrees. Turn the risen dough out onto an unfloured work surface. Divide the dough into eight equal pieces. Gently reshape each piece of dough into a ball. Cover with plastic wrap or a damp kitchen towel, and let the dough rest at least 15 minutes but no more than 30 minutes.

2. Working with one piece of dough at a time and keeping the other pieces covered, stretch and pull the dough into a 7- to 8-inch round. Set it aside while you stretch out the remaining rounds of dough. You’ll want to form and fill just four at a time, and then work on the other four while the first set bakes. (Cooks Illustrated stacks the rounds with squares of parchment paper)

3. Spread 2 tablespoons pesto onto each round of dough, leaving about a 1-inch border around the edge. Divide the toppings evenly between the eight dough rounds, forming a pile in the center of the bottom half of each dough round and leaving a 1-inch border uncovered.

4. Fold the top half of the dough over the filling-covered bottom half, leaving ½-inch border uncovered. With your fingertips, lightly press around the silhouette of the filling and out to the edge to lightly seal the dough shut.

5. Beginning at one end of the seam, place your index finger diagonally across the edge and gently pull the bottom layer of the dough over the tip of your index finger; press into the dough to seal. Repeat the process until the calzone is fully sealed.

6. With a pastry brush, brush the tops and sides of the calzones with olive oil. Carefully transfer the calzones to parchment paper; Bake on a cookie sheet or baking stone. Bake until the calzones are golden brown, about 11 minutes; Remove the calzones from the parchment, cool 5 minutes, and serve. While the first batch of calzones bakes, form the second batch and bake them after removing the first batch from the oven.

Basic Pizza Dough Recipe:

-4 cups of Bread flour

-2 1/4 teaspoons instant or rapid rise yeast

-1 1/2 teaspoons salt

-2 Tablespoons Olive Oil

-1 1/2 cups of warm water (110 degrees)

1.With a stand mixer combine flour, yeast, and salt together.

2. With the mixer running, pour the oil, then the water slowly into the flour mixture until a rough ball forms 30 to 40 seconds. Stop the mixer and let dough rest for 2 minutes. Turn back on the mixer for 30 seconds to 1 minute longer. The dough should be sticky and cling to the blade, add 1/4 cup more flour if needed to make a smooth dough. Form dough into a round ball place in a large oiled bowl (I spray it with Pam). Cover tightly with plastic wrap and let rise in a warm place until doubled in size (1 to 1 1/2 hours).

**Note** Using bread flour is what gives the crust a more Pizzeria taste, it is chewy once baked and spreads more thinly while forming it into a pizza round. You can substitute all-purpose flour or whole wheat four but it will not taste as good.

ENJOY!



Tuesday, April 6, 2010

Big Beautiful Blueberry Muffins

I found this recipe in a baking book my mother- in- law gave me called,
The America's Test Kitchen- Family Baking Book.
They turned out so good, my family loved them. A yummy addition to our dinner, and then the leftovers for the next morning's breakfast.
These muffins do turn out very BIG, moist, and really smooth and chewy texture.
You can also substitute the blueberries for poppy seeds for a lemon poppy seed muffin.
Enjoy!


Big Beautiful Blueberry Muffins

What You Need:

-3 cups of all-purpose flour
-1 cup sugar
-1 Tablespoon baking powder
-1/2 teaspoon baking soda
-1/2 teaspoon salt
-1 1/2 cups low-fat or fat-free plain yogurt (I used Stonyfield Organic)
-2 large eggs
-8 Tablespoons unsalted butter, melted and cooled
-1 1/2 cups of fresh or frozen blueberries
-1 tablespoon flour
-1 tablespoon grated fresh lemon zest (optional)

How to Make:

1. Heat oven to 375 degrees. Grease a 12-cup muffin tin(I use Pam non-stick spray).

2. Whisk flour, sugar, baking sugar, baking soda, and salt together in a large bowl. In another bowl whisk the yogurt,eggs, and fresh lemon zest together until smooth. Gently fold the yogurt mixture into the flour mixture, until just combined, then fold in the melted butter.

3. In a seperete bowl mix the 1 Tablespoon of flour with the blueberries. (if using frozen blueberries DO NOT thaw). Mix just until the blue berries are covered with the flour.
Gently stir in the blueberries into the batter.

4. Using a 1/3 cup measuring cup, portion the batter into each muffin cup. Bake until golden brown and a toothpick inserted into the center comes out with just a few crumbs attached, 25 to 30 minutes.

5. Let the muffins cool for at least 5 minutes in the pan, before flip out. Let cool at least 10 more minutes then serve.


Honey Roasted Chicken

This is a very nice Spring meal.
It has a simple glaze that makes the chicken really moist and flavorful.
The 'passing sauce' that is made after the chicken is done finishes off the chicken amazingly.
I served this chicken with mashed potatoes, vegie medley, and Big Beautiful blueberry muffins.
Enjoy!


Honey Roasted Chicken

What you Need:

1 tablespoon salt
2 teaspoons pepper
1 teaspoon paprika
2 whole chickens (3 1/2 to 4 pounds each), giblets discarded
1 teaspoon cornstarch
1 cup plus 1 tablespoon water
1/2 cup honey
5 tablespoons cider vinegar
1 cup low-sodium chicken broth
2 teaspoons dried thyme leaves
2 tablespoons butter, cut into pieces and chilled

How To Make:

1. Preheat the oven to 375 degrees and make sure the oven rack is in the middle of the oven. In a small bowl combine the salt, pepper and paprika. Pat the chickens dry with paper towels and rub the spice mixture under the skin and over the outside of each chicken. Tuck the wings behind the back and tie the legs together with kitchen twine.

2. Stir the cornstarch and 1 tablespoon water together in a small bowl until no lumps remain; set aside. In a small saucepan bring the honey and 4 tablespoons vinegar to a simmer over medium-high heat. Cook until the mixture is reduced to about 1/2 cup, 8-10 minutes, stirring occasionally. Slowly whisk the cornstarch mixture into the glaze. Return to a simmer and cook for one minute.

3. Arrange the chickens, breast side down, on a V-rack set inside a roasting pan. Roast until the chickens are golden, about 35 minutes. Remove the roasting pan from the oven and carefully with a wad of paper towels, flip the chickens so that they are breast side up. Raise the oven temperature to 450 degrees. Pour 1 cup water and the broth into the roasting pan. Return the roasting pan to the oven and roast until the thigh meat registers 165 to 170 degrees, about 35-45 minutes. Brush the chickens evenly with a thick layer of the glaze (you’ll have some remaining to brush on later) and continue to roast until the glaze is golden brown, about 10 minutes. Transfer the chicken to a cutting board and brush with the remaining glaze and let it rest for 15 minutes (this is important if the chicken is cut too quickly, all the delicious juices will escape and the meat will be dry).

4. While the chicken is resting, pour pan juices and any accumulated chicken juices into a saucepan and skim any fat. Stir in the thyme. Bring to a simmer and cook until the sauce is slightly thickened and reduced to 1 cup, about 15 minutes. Off the heat whisk in the butter and remaining vinegar. Season with salt and pepper. Carve the chickens and serve, passing the sauce at the table.


Recipe Source: My Kitchen Cafe

Friday, March 26, 2010

Shrimp Fried Rice

I always love eating out at Japanese Steak house's where they cook the food in front of you on a huge grill. The fried rice is always so yummy.
To make this home made fried rice I use my biggest skillet pan and it works just fine.
The recipe calls for Shrimp, however, I have used chicken, beef and pork before. Just make sure you cut the meat very thin before cooking.
This is a fun meal to make, and eat!
Enjoy!


Shrimp Fried Rice

What you need:
1 lb. raw shrimp, peeled and deveined
1 tsp. kosher salt
Freshly ground black pepper
1 tsp. cornstarch
2 tbsp. vegetable or canola oil, divided
3 eggs, beaten
2 stalks green onions, minced
4 cups steamed white or brown rice
¾ cup frozen peas and carrots, defrosted
1 tbsp. soy sauce
Few drops sesame oil

How To Make:
1. In a medium mixing bowl, combine the shrimp, salt, pepper and cornstarch, and toss well to coat the shrimp. Let sit at room temperature for 10 minutes. Heat a large skillet or wok over high heat. When a drop of water immediately sizzles and evaporates, the pan is hot enough to add 1 tablespoon of the oil. Swirl to coat the pan well.

2. Add the shrimp to the hot pan and quickly spread them out so that they are in a single layer, and all touching the pan surface. (You may need to do this in two batches to ensure even cooking.) Let them cook untouched for 30 seconds, then flip over (tongs work well for this) and let cook for 30 more seconds, so that the shrimp are about 80% cooked through. Remove to a plate and set aside.

3. Lower the heat on the pan to medium. Add the eggs to the pan and stir quickly, to break up and scramble the eggs. When the eggs are almost cooked through but still slightly runny in the middle, remove from the pan to the same plate as the shrimp.

3. Use paper towels to wipe the pan clean and return the pan to high heat. Add the remaining 1 tablespoon of oil, swirling to coat. Once the oil is very hot, add the green onions to the pan and cook until fragrant, about 15 seconds. Add the rice to the pan and mix well to combine with the green onions. Spread the rice out evenly over the pan and let cook without stirring, until you hear the rice grains sizzle, about 1 to 2 minutes. Toss the rice a bit with your spatula, and again spread it out over the cooking surface.

4. Drizzle the soy sauce all over the rice, and toss again. Add the peas and carrots, the cooked shrimp and eggs, and the sesame oil to the pan. Toss to combine all the ingredients well with the rice. Let everything heat back up again until the rice grains are sizzling again. Add additional soy sauce to taste, if needed. Serve.

Source: adapted from Simply Recipes


Thursday, March 25, 2010

Simple Chicken Tortilla Soup

I love this recipe!
It is so easy to throw together, it is very healthy, and it is so very delicious.
I like getting the MILD green enchilada sauce, but if you like more of a 'zing' in your Tortilla soup you can go for Medium.
A Perfectly Simple week night meal for any time of the year.
Enjoy!


Simple Chicken Tortilla Soup

What you Need:

-4 cups of Cooked Chicken
-2 cans of great Northern Beans
-5 cups of low-sodium chicken broth
-1 large can OR 2 small cans of MILD GREEN enchilada sauce
-1 1/2 cups of frozen sweet white corn
-1/2 cup chopped cilantro

How to Make:

1. I cook my chicken by boiling 3-4 chicken breasts in water. When cooked, I wash the chicken and chop it up.

2. Put all of the ingredients (except cilantro) into a pot and bring to a boil. Turn down and simmer for 20 minutes. Stir in Cilantro.

3. Serve with desired topping: shredded cheese, tortilla chips, salsa, sour cream. . .what ever you like. (I like to keep mine simple with just tortilla chips crushed over the top)