Showing posts with label After School Snacks. Show all posts

Thursday, April 28, 2011

Carmelitas

Yummy Yummy. . .
These Carmelitas are so good!
Crispy oatmeal cookie base with a layer of chocolate,
then a layer of gooey carmel topped with the cookie base.
You can make these even more sinful. . .
with a scoop of Vanilla Ice Cream and a drizzle of chocolate sauce to top it off.
My boys LOVED these, and my oldest son declared that we open up our own restaurant and serve this dessert.
I do agree, this dessert is Restaurant quality!


Carmelitas

What you need:

-1 jar Mrs. Richardson's Caramel/Butterscotch topping
-12 oz package chocolate chips (a good brand like Guittards or Ghiradelli)
-2 cups flour
-2 cups oatmeal (I use the quick or Instant Oatmeal)
-1 1/2 Cups brown sugar
-1 tsp baking soda
-1/2 tsp salt
-1 1/2 Cup butter, melted

How to make:

1. Combine flour, oatmeal, melted butter, brown sugar, baking soda, salt in mixing bowl. Press 1/2 mixture into the bottom of a greased 9 by 13 pan. Bake for 17 minutes at 325 degrees.

2. Take out and layer chocolate chips and then the jar of caramel/butterscotch topping. Crumble the remaining crumbs over the topping and return to oven to bake for another 17 minutes.

3. Remove from oven and let sit for at least 5 hours before serving. If you put it in the fridge you won't need to let it sit as long (1 or 2 hours).

4. Cut into bars and serve.

Option for serving: put a scoop of Vanilla ice cream on top of one Carmelita and drizzle chocolate sauce on top.

Yum! Enjoy.

Thursday, April 14, 2011

Chocolate Chip M & M Cookies

These are one of my boys favorite cookies.
They love the M&M's in them.
We made them together over Spring break, and used Spring colored M&M's.
I usually make them with the regular colored M&M's but could not pass up the holiday M&M's.
These will be soft on the inside and a little crispy on the outside.
Yum.


Chocolate Chip M & M Cookies
makes 2 dozen

What you need:

-1 cup white sugar
-1 cup brown sugar
-2/3 cup unsalted butter, softened
-2/3 cup butter flavored Crisco shortening
-2 eggs
-2 tsp. vanilla
-3 cups unbleached white flour
-1 tsp. baking soda
-1 tsp. salt
-6 oz. milk chocolate chips
-8 oz. M&M candies

How To Make:

1. Preheat oven to 350 degrees. Mix sugars, butter and shortening until light and fluffy.

2. Next add the eggs and vanilla until combined.

3. Slowly add the flour, baking soda and salt. Be careful not to over mix the dough.

4. Turn off the mixer and hand fold the chocolate chips and M&M candies until well combined.

5. Using a small ice cream scoop, drop the cookies onto ungreased cookie sheets about 2 inches apart.

6. Bake at 350 degrees for 10 minutes. Cookies should have a slight golden on top, but also look slightly undone. You don't want to overcook these or they will be hard when cool.

7. Remove from the oven and allow the cookies to cool completely on the cookie sheet. I have found this to be the best way to guarantee perfectly soft cookies each and every time.

Enjoy!

Sunday, June 13, 2010

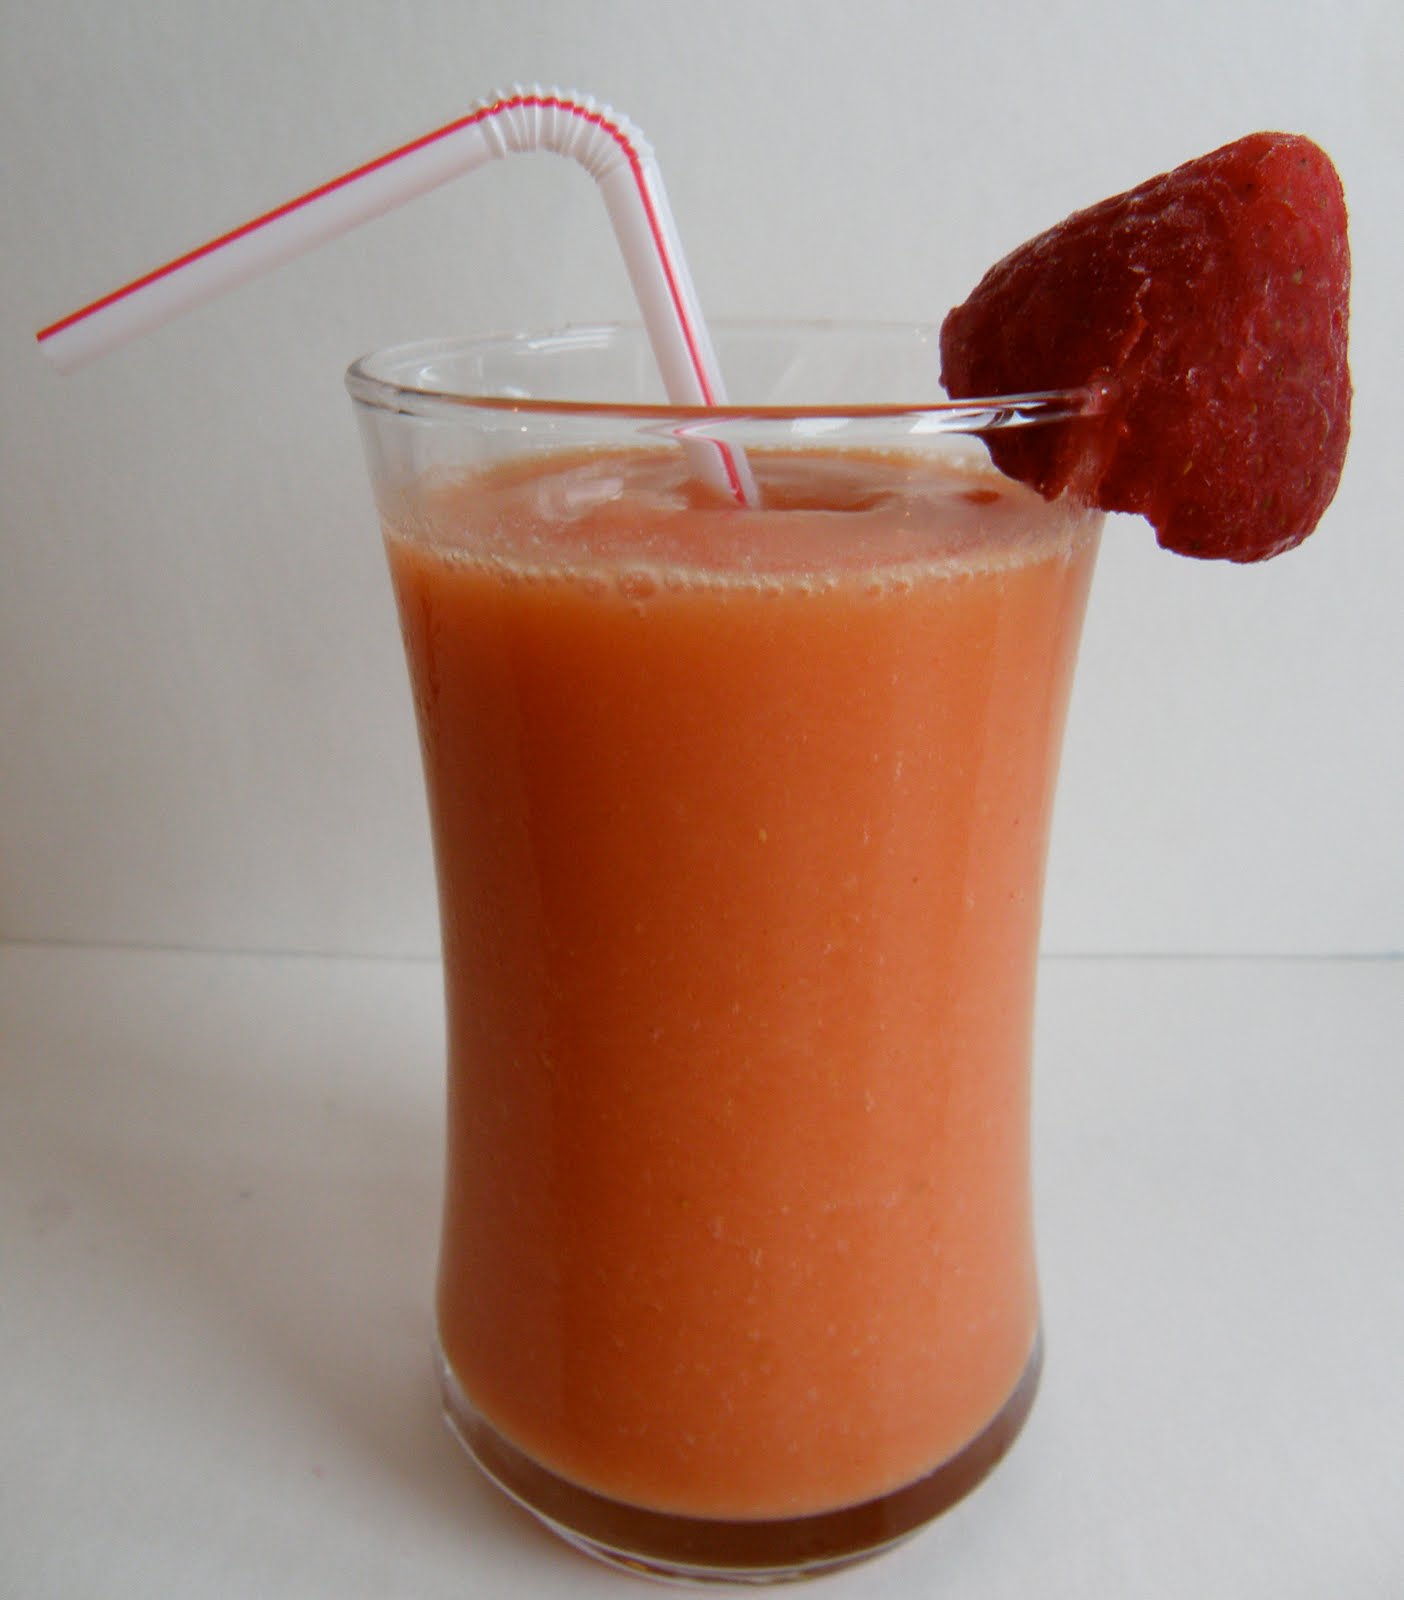
Caribbean Passion Fruit Smoothie

A cold fresh smoothie tastes like summer to me!
This is a favorite smoothie recipe in our home. I usually make two batches of this recipe to feed the four of us. I wouldn't double it in your blender, unless you have a huge blender that can handle that much blending. I find that it mixes better and faster if I just do one batch at a time.
If you live in the west you will know the name Jamba Juice, a smoothie making establishment. This recipe is a copy cat recipe from one of their smoothies.
I hope you are all enjoying your summer and keeping cool in the summer heat!


Caribbean Passion Fruit Smoothie
makes 2 tall cups

What You Need:
-1 cup mango juice
-1/2 cup frozen peaches
-1 cup frozen strawberries
-1/2 cup crushed ice
-1 cup orange sherbet


Add all ingredients to bender and blend. If too thick, add more mango juice.
Serve and Enjoy!

Wednesday, June 9, 2010

Monster Cookies

My kids absolutely LOVE these cookies!
This is a great recipe to have your kiddos help you make.
They are very easy to make and pretty much fail-proof.
A few things, I have used both creamy and crunchy Peanut butter for this recipe and both turned out great. The Crunchy is going to give you more of a chunky and crunchy cookie. Also, I always use the quick rolled oats when baking cookies, they will be more chewy this way.
The cookies might look slightly underdone when you take out and press the M&M's in them, but as they cool they will be perfectly soft and chewy.
I have made these for church bake sales, and they are always a huge it!
These Monster cookies are Super fun to make and eat.


Monster Cookies


What you Need:

1/2 c butter, softened

1 3/4 C peanut butter (creamy or crunchy)

1 1/3 C brown sugar

1 C sugar

1 Tbsp corn syrup

1/2 Tbsp vanilla

2 tsp baking soda

3 eggs

1/2 C semi-sweet chocolate chips

4 1/2 C quick rolled oats

M & M’s

How To Make:

1. Preheat oven to 350 degrees. Line a baking sheet pan with Parchment paper or lightly grease with non-stick spray.

2. Mix all ingredients together until well combined, don't put the M&M's in yet they will be used after the cookies are baked.

3. For bigger cookies use a 1/4 cup measuring scoop, for smaller cookies use a cookie scoop and roll the dough into a ball and place on prepared cookie sheet. Bake for 10-15 minutes Be careful not to over bake.

4. As soon as the cookies come out of oven, press M & M’s into the top of the cookies.

5. Before serving or eating wait for the cookies to cool.

Enjoy!

Wednesday, June 2, 2010

Best EVER Banana Bread

When are little family lived in Columbus, OH during our medical school years.
We made many life long friends.
We all made a Columbus Friends Cookbook.
Many of my favorite recipes are from this cook book, this Banana Bread recipe is one of them.
I have tried many other Banana Bread recipes none compare to this one.
It is by far the BEST EVER Banana Bread recipe.
And it also reminds me of my sweet friend Margo who is a great cook!

*Tip-the bread will be much sweeter if the Bananas you use are very ripe, like almost all brown ripe.*


Best EVER Banana Bread
Makes 2 loaves

What you Need:
-1 cup butter
-2 cups sugar
-4 large eggs
-2 tsp. vanilla
-2 tsp. lemon juice
-1 cup sour cream
-2 cups mashed bananas (about 4 really ripe bananas)
-3 1/2 cup all-purpose flour
-1 tsp. baking soda
-2 tsp. baking powder

Topping:
- 1/2 cup packed brown sugar
- 1 1/2 teaspoon cinnamon


How To Make:

1. Heat oven to 325 degrees. Grease two bread pans.

2. Mix butter and sugar together until creamy. Add eggs and vanilla until well combined. Blend in lemon juice, sour cream, and mashed bananas.

3. In a separate bowl sift together flour, baking soda, and baking powder. Mix in with other ingredients until just combined, do not over mix.

4. Pour batter into the two greased bread pans.

5. Mix together the brown sugar and cinnamon for the topping. Sprinkle on top of batter.

6. Bake for 50 - 60 minutes or until knife inserted come out with just a few wet crumbs.


Recipe Source: My good friend Margo :-)

Tuesday, April 27, 2010

Lemon Sheet Cake with Cream Cheese Frosting

This Lemon cake is Very Easy and Quick to make.
It is also so Yummy!
The Lemon Cream Cheese Frosting makes this cake irresistible.
The Cake is very soft and moist, just how you would want a lemon cake to be.
A perfect Spring or Summer dessert. This recipe makes a lot, so perfect for sharing with others or taking to a fun event.


Lemon Sheet Cake with Cream Cheese Frosting
makes one cookie sheet pan

Cake Ingredients:
-1 lemon cake mix
-4 eggs
-1 can lemon pie filling

Mix the cake mix and the eggs together in a electric mixer. Mix on Medium speed for four minutes. With a spatula hand mix in pie filling until well combined. This dough is very sticky. Spread onto a greased cookie sheet and bake at 350 for 18-20 minutes. Let cool completely before frosting.

Lemon Cream Cheese Frosting:
-1 (8 ounces) package cream cheese
-1/4 butter, softened
-1 juice of one lemon
-1 tsp vanilla extract
-3-4 cups confectioners' sugar

Beat cream cheese and butter until completely combined. Then add lemon juice, and vanilla extract together until smooth and fluffy. Add confectioners' sugar 1 cup at a time until you get the consistency you like. It should be very creamy.

Frost the Lemon Sheet cake with the Cream Cheese Frosting. Garnish with fresh berries.
Enjoy!

Wednesday, April 21, 2010

Homemade Oreo Cookies

Homemade Oreo's are always a Big hit at our house!
With three boys in the house, they eat these yummy cookies up fast. Let's be honest, I have a few myself.
Two soft chocolate cookies with rich cream cheese frosting sandwiched between.
What's not to love?
This recipe is easy enough to let your kiddos help, if you choose.
A glass of milk will be perfect to go a long side these Oreo's.
Yum.


Homemade Oreo Cookies

Chocolate Cookie:
-2 devils food cake mixes
-4 beaten eggs
-1 cup of oil

1. Preheat oven to 350 Degrees. Prepare a cookie sheet by lining with parchment paper or grease with non-stick spray.
2. In a medium mixing bowl mix all three above ingredients until well combined. Roll into about 1 1/2 inch balls. Place on a cookie sheet and bake for 6-9 minutes.
3. Take out and cool completely before adding filling.

Cream Cheese Frosting Filling:
1 - stick butter (1/2 cup)
1 - 8oz package cream cheese
3-4 cups - confectioner's sugar (depending on desired consistency)
1 - tsp vanilla extract

1. Cream butter and cream cheese add vanilla and mix well. Add confectioner's sugar slowly until you reach your desired consistency.
2. Spread 2-3 Tablespoons of frosting in between each cookie.

Store cookie's in an air tight container to keep moist.

Enjoy!

Wednesday, April 14, 2010

Blondies

Yes, I am blond
and I love me some Blondies!
These little bars are so very good.
Butterscotch chips are usually used in blondies, this recipe uses White chocolate chips.
I think it gives the blondies a deeper and richer flavor and really brings out the brown sugar from the cookie base.
These are so very easy to make, hand mixes up in 10 minutes bakes in 25.
A great recipe to have your little kiddos help you with, if you choose.
Don't forget to eat these with a glass of cold milk, YUMMY!


Blondies
makes 24 in a 13 by 9 baking pan

What You Need:
-1 1/2 cups all-purpose flour
-1 teaspoon salt
-1 teaspoon Baking Powder
-12 Tablespoons (1 1/2 sticks) unsalted butter, melted and cooled
-1 1/2 cups packed light brown sugar
-2 large eggs
-4 teaspoons vanilla extract
-1/2 cup semisweet chocolate chips
-1/2 cup white chocolate chips
-1/2 cup chopped pecans (optional)

How to make:
1. Preheat oven to 350 degrees. Line a 13 by 9 inch baking pan with foil or Parchment paper, and then grease the foil or parchment paper with Pam spray.

2. In a medium bowl whisk the flour, baking powder, and salt together.

3. In a large bowl, whisk the butter and brown sugar together. Whisk in the eggs and vanilla until combined. Stir in the flour mixture until just incorporated. Stir in the chips and nuts.

4. Scrape the batter into the prepared pan and smooth the top. Bake the blondies until a toothpick inserted into the center comes out with just a few moist crumbs attached, 22-25 minutes.

5. Let the Blondies cool completely in the pan for about 2 hours. Remove the blondies from the pan, cut into squares and Enjoy!


Source: America's Test Kitchen

Tuesday, April 6, 2010

Big Beautiful Blueberry Muffins

I found this recipe in a baking book my mother- in- law gave me called,
The America's Test Kitchen- Family Baking Book.
They turned out so good, my family loved them. A yummy addition to our dinner, and then the leftovers for the next morning's breakfast.
These muffins do turn out very BIG, moist, and really smooth and chewy texture.
You can also substitute the blueberries for poppy seeds for a lemon poppy seed muffin.
Enjoy!


Big Beautiful Blueberry Muffins

What You Need:

-3 cups of all-purpose flour
-1 cup sugar
-1 Tablespoon baking powder
-1/2 teaspoon baking soda
-1/2 teaspoon salt
-1 1/2 cups low-fat or fat-free plain yogurt (I used Stonyfield Organic)
-2 large eggs
-8 Tablespoons unsalted butter, melted and cooled
-1 1/2 cups of fresh or frozen blueberries
-1 tablespoon flour
-1 tablespoon grated fresh lemon zest (optional)

How to Make:

1. Heat oven to 375 degrees. Grease a 12-cup muffin tin(I use Pam non-stick spray).

2. Whisk flour, sugar, baking sugar, baking soda, and salt together in a large bowl. In another bowl whisk the yogurt,eggs, and fresh lemon zest together until smooth. Gently fold the yogurt mixture into the flour mixture, until just combined, then fold in the melted butter.

3. In a seperete bowl mix the 1 Tablespoon of flour with the blueberries. (if using frozen blueberries DO NOT thaw). Mix just until the blue berries are covered with the flour.
Gently stir in the blueberries into the batter.

4. Using a 1/3 cup measuring cup, portion the batter into each muffin cup. Bake until golden brown and a toothpick inserted into the center comes out with just a few crumbs attached, 25 to 30 minutes.

5. Let the muffins cool for at least 5 minutes in the pan, before flip out. Let cool at least 10 more minutes then serve.


Tuesday, March 30, 2010

Monkey Bread Mini's

This recipe is a very Easy way to make the
all-famous Monkey Bread.
So easy that I usually have my two kiddos help me do it. They love to help and EAT these really tasty treats.
They are sweet, gooey, cinnamon-y, and a little crispy on the outside very
Yummy!


Monkey Bread Mini's
Makes 12 muffins OR 6 Jumbo Muffins


2 tubes of Pillsbury Refrigerated french bread dough
1/2 cup sugar
1 teaspoon cinnamon
6 tablespoons butter
1/3 cup brown sugar

1. Spray your muffin tin with non-stick spray. Cut in small cubes so in total you should have around 80 little pieces of dough. In a bowl, combine the sugar and cinnamon. Dip each piece of dough into the cinnamon-sugar mixture until totally covered. Divide evenly between the muffin cups. In a saucepan boil the butter and brown sugar. Spoon about a teaspoon of the brown sugar/butter mixture over each muffin cup. Bake in a 350 degree oven for about 20-25 minutes or until baked through.

Option: You can drizzle icing over the tops of the muffins after they get out of the oven. (mix 1 cup of powdered sugar with 1 tablespoon of milk)

These taste the best when hot and fresh out of the oven!

Enjoy!

Wednesday, March 17, 2010

Colored Velvet Cup Cakes

These are Very Yummy Mini Cup Cakes!
You can use whatever colored decorating paste you want depending on the color you are after. I think it would be very cute to make little pink or blue ones for a baby shower or orange for Halloween, Yellow for Easter, the possibilities are endless :-).
I use Wilton brand Decorating paste you can buy at Micheals, Hobby Lobby, or any store that carries the Wilton baking line.
You could also make regular sized cupcakes with this recipe.
Have fun!


Colored Velvet Cup Cakes

Makes 36 mini cup-cakes

What you Need:

1 Box yellow cake mix

4 eggs

1/2 Cup water

1/2 Cup vegetable oil

1 small box instant vanilla pudding mix

1/2 Cup plain yogurt or sour cream

5-8 drops of your color of decorating paste (Pink, Green, Orange, Yellow, Blue. . . )

Frosting:

8 oz softened cream cheese

1 stick softened butter

1 lb powdered sugar

Colored Sugar Sprinkles if desired

How To Make:

1. Preheat oven to 350 degrees F. In a stand or electric mixer, add cake mix, eggs, water, oil, pudding, and yogurt. Beat on medium for 1 1/2 minutes. Slowly beat in 5-8 drops of green decorating paste until you get desired color of green. Scoop batter into paper lined mini cupcake tins. Bake for 15-18 minutes or until cooked through. Let cool completely.

2. To prepare frosting, beat cream cheese and butter until creamy. Slowly add powdered sugar until creamy and thick.

3. Frost cupcakes and sprinkle with colored sugar if desired.

ENJOY!

Recipe Source: Adapted from Picky Palate

Tuesday, February 23, 2010

Cherry Turnovers

We just celebrated my husbands 32nd Birthday!
His all time favorite dessert is Cherry pie.
So with a little creativity I made these yummy Turnovers instead of the traditional Cherry Pie.
The result was VERY Yummy!
You can also substitute the cherry pie filling for apple or blueberry filling.
The cream cheese crust really gives these turnovers a sweater taste.
We topped ours off with a scoop of vanilla Ice cream, yum.


Cherry Turnovers
Makes about 8 turnovers

Friday, February 19, 2010

Thick and Chewy Chocolate Chip Cookie Bars

My husband said that these were the BEST bar cookies he had EVER had!
Needless to say these are really very good bar cookies.
This recipe makes a lot, a yummy crowd pleaser.
If you want to make less, you can half the recipe and bake it in a 9 by 13 pan.
Enjoy!


Thick and Chewy Chocolate Chip Cookie Bars

Adapted from My Kitchen Cafe

Makes a cookie sheet pan of bars

4 cups all purpose flour
1 teaspoon salt
1 teaspoon baking soda
3 sticks butter, melted and cooled slightly
2 cups light brown sugar
1 cup granulated sugar
2 large eggs
2 large egg yolks
4 teaspoons vanilla extract
2 cups semi-sweet chocolate chips
1 large milk chocolate bar, chopped up
1 cup chopped pecans (optional)


1. Preheat the oven to 325 degrees. Adjust the oven rack to lower-middle position. Spray the pan with nonstick cooking spray.

2. Mix the flour, salt, and baking soda together in medium bowl; set aside. Whisk the melted butter and sugars in a large bowl until combined. Add the egg, egg yolk, and vanilla and mix well. Using a rubber spatula, fold the dry ingredients into the egg mixture until just combined; do not overmix. Fold in the chocolate chips and turn the batter into the prepared pan, smoothing the top with the spatula.

3. Bake until the top of the bars is light golden brown, slightly firm to the touch, and edges start pulling away from sides of pan, 45-50 minutes. DO NOT OVER COOK. They may seem undercooked, however when they cool they will be perfectly chewy. Cut into 2-inch squares and serve.

Tuesday, February 9, 2010

7- Layer Dip

7 - Layer dip is so good!
A great appetizer to make for parties, or fun get-togethers with family and friends.
One thing that I don't like about the traditional 7 layer dip is the way you just plop the can of beans into the pan and them spread them around. That process just grosses me out. :-)
So I heat them in a pan and add a few yummy ingredients to make the beans a bit tastier.
The Pico De Gallo also makes this dip just that much tastier. You can see my Pico De Gallo recipe here.
This dip should be eaten with in 24 hours of making, it does not keep well after that.
I have never had many leftover past 24 hours anyways. This dip is eaten up fast!
ENJOY!

7 - Layer Dip

1st Layer-
-1 can of refried Beans
-1 small can of diced green chilies
-1/2 to 1 teaspoon of Tabasco (or other hot sauce)
-1/2 teaspoon of cumin
*Begin by putting the refried beans into a small saucepan over medium-low heat, add the chilies, Tabasco, and cumin. Mix well.
*Spread into a glass pan, or larger plate.

2nd Layer-
-1 cup of Shredded Sharp cheddar cheese
*Layer on top of beans

3rd Layer-
-1 cup of sour cream (or enough to spread a complete layer)
*Layer on top of Cheese

4th Layer-
-2 avocados (mashes)
-3 spoon fulls of sour cream
-1 cup of pico de gallo
*Combine all together and make guacamole, add on top of sour cream layer.

5th Layer-
-1 cup of Monterey Jack cheese
*Layer on top of guacamole

6th Layer-
-chopped black olives

7th Layer-
- 1/2 cup of pico de gallo

Serve with Tortilla Chips and ENJOY!

Pico de Gallo

I love Pico de Gallo!
It is fresh, healthy, and so easy to make.
You can serve it with Tortilla chips, add it to Guacamole, or 7-layer dip.
Yummy.


Pico de Gallo

-5 plum OR Roma tomatoes (firm, not soft)
- 1/2 large or 1 small onion
- 2 jalapeno peppers
- 1 medium bunch of cilantro
- 1/2 of a lime
- salt

How To Make:

1. Dice tomatoes and onions put in a bowl.

2. Cut the ends off of the jalapenos, scrape the seeds from the jalapenos and discard them. Dice the jalapenos, and to the tomato and onion mixture.

3. Now chop up the bunch of cilantro. You can cut off the long stems before you start, but there’s no need to peel the leaves from the stems. Add to the bowl

4. Squeeze half of the small lime into the bowl. Season with salt (to taste).

*Serve with Tortilla Chips.

*You can also add this mixture to 2 mashed avocados with one or two scoops of sour cream for a yummy Guacamole!

Sunday, January 24, 2010

Sugar Cookie Bouquet

This sugar cookie recipe makes firmer cookies which make great cookies for frosting and decorating, also good for Cookie Bouquets.
One thing I really like about this recipe is that when you cook the shaped cookie dough they retain their shape. It does not puff out or flatten out.
They also taste very good, the vanilla and almond extract make this cookie yummy.
They are also firm, but soft, very good.

Sugar Cookies

6 c unbleached, all-purpose flour
4 tsp baking powder
2 c sugar
4 sticks butter
2 egg
1 tsp pure vanilla extract
1 tsp pure almond extract
**Powdered sugar for rolling out**

Preheat oven to 350.

1. Combine the flour and baking powder, set aside. Cream the sugar and butter. Add the egg and extracts and mix. Gradually add the flour mixture and beat just until combined, scraping down the bowl, especially the bottom.

2. Do not refrigerate, right away roll onto a floured surface (USE POWDERED SUGAR for rolling out) and cut into shapes. Place on parchment lined baking sheets and bake for 10-12 minutes. Let sit a few minutes on the sheet, then transfer to a cooling rack.

IF MAKING A COOKIE BOUQUET: you will need to stick wood skewers in the cookie, right after you take them out of the oven, the cookie still needs to be hot when you stick it in. Then let completely cool before you frost.

Icing

(This will cover 2-3 dozen)

4 TBSP meringue powder
1/2 c. water
1 lb. powdered sugar
1/2 tsp light corn syrup
1/2 teaspoon of Almond Extract

1. Combine the meringue powder and water. With the paddle attachment of an electric mixer, beat until combined and foamy.

2.Sift in the powdered sugar and beat on low to combine. (Do NOT skip the sifting!)

3.Add in the corn syrup and extract.

Increase speed to high and beat for about 5 minutes, just until the icing is glossy and stiff peaks form.

4. The frosting will be white, if you want to add color use food coloring.


Monday, December 7, 2009

Thick and Chewy Gingerbread Cookies

These beauties are by far the BEST Gingerbread cookies I have ever made.
Not only are they soft and delicious, they are so simple to make!
There is no need to be afraid or intimidated in making these cookies, they are easier to make then sugar cookies!
The dough is very easy to work with too.
My 6 year old son helped me cut them all out into shapes, and then we all enjoyed eating them.
So very yummy!
I found this recipe on My Kitchen Cafe's 'Sugar Rush- 12 recipe's in 12 days'.

Thick and Chewy Gingerbread Cookies
Recipe From My Kitchen Cafe


*Makes about 2 dozen gingerbread men*

3 cups flour
¾ cup packed dark brown sugar
¾ teaspoon baking soda
1 tablespoon ground cinnamon
1 tablespoon ground ginger
½ teaspoon ground cloves
½ teaspoon salt
12 tablespoons butter softened to room temperature (but not warm!), cut into 12 pieces
¾ cup light or dark molasses
2 tablespoons milk

1. With an electric mixer, stir together the flour, brown sugar, soda, cinnamon, ginger, cloves and salt at low speed until combined, about 30 seconds. Stop the mixer and add the butter pieces. Mix at medium-low speed until the mixture is sandy and resembles fine meal, 1 to 2 minutes. Reduce the speed to low and with the mixer running, gradually add the molasses and milk; mix until the dough is evenly moistened about 20 seconds. Increase the speed to medium and mix until thoroughly combined, about 10 seconds.

2. Scrape the dough onto a work surface and divide it in half. Working with one portion at a time, roll the dough ¼ inch thick between 2 large sheets of parchment or wax paper. Leaving the dough sandwiched between the parchment or wax paper, stack the dough on a baking sheet and freeze until firm, 15 to 20 minutes.

3. Preheat the oven to 350 degrees. Line 2 baking sheets with parchment paper or silpat liners.

4. Remove one dough sheet from the freezer and place on the counter. Peel off the top parchment or wax paper sheet. Gently cut the dough into 5-inch gingerbread people or 3-inch gingerbread cookies, transferring the shapes to the prepared baking sheets with a wide metal spatula and spacing them ¾ inch apart. Set the scraps aside. Repeat with the remaining dough until the baking sheets are full. Because flour is not added during rolling, dough scraps can be rolled and cut as many times as necessary.

5. Bake the cookies until set in the centers and the dough barely retains and imprint when touched very gently with fingertip, 8 to 9 minutes. Do not overbake!! Cool the cookies on the sheets 2 minutes, then remove the cookies with a wide metal spatula to a wire rack; cool to room temperature. Gather the scraps; repeat the rolling, cutting and baking. Frost as desired (You can use a ziploc bag filled with simple white icing).

6. Store soft gingerbread in a wide, shallow airtight container or tin with a sheet of parchment paper between the cookie layers. These cookies are best eaten within one week.

ENJOY!!


Thursday, October 22, 2009

Candy Corn Kiss Cookies

I knew as soon as I saw these cookies on
The Idea Door,
that I had to make them!
If you have never been over to her blog you have to check it out.
She has some of the best IDEAS.
Our family loves the regular Kiss cookies made this same way but with a chocolate kiss.
The candy corn kiss just looks so fun.
I found the candy corn kisses at Target in the seasonal area.
My kids love to help me unwrap the kisses, and put them in the cookie, then of course eat them!


Candy Corn Kiss Cookies
adapted from the Idea Door

What you need:
1/2 cup butter, room temperature
1/2 cup creamy peanut butter, room temperature
1/2 cup granulated sugar
1/2 cup firmly-packed brown sugar
1 egg
1 tablespoon milk
1 teaspoon pure vanilla extract
1 3/4 cups all-purpose flour
1 teaspoon baking soda
1/2 teaspoon salt
1/4 cup granulated sugar (for rolling cookie dough in)
48 Hershey® Kisses® chocolate candies, unwrapped


How to Make:

1. Preheat oven to 375 degrees F.

2. In a large bowl, cream butter and peanut butter until light and fluffy. Gradually add 1/2 cup granulated sugar and brown sugar; beating until light and fluffy. Add egg, milk, and vanilla extract; beat well. Add flour, baking soda, and salt; stir into creamed mixture until well mixed.

3. Roll cookie dough into 1-inch balls. Optional - you can lightly roll cookie dough balls in the 1/4 of sugar before you bake.

4. Place balls, 2 inches apart, onto ungreased cookie sheets.

5. Bake 8 to 10 minutes or until lightly browned. Remove from oven and immediately press a chocolate kiss or candy corn kiss into the center of each cookie (cookie will crack around edges). Remove from cookie sheet and let cookies cool on wire racks or tin foil.

Yields 4 dozen cookies.

Enjoy!

Friday, October 9, 2009

Low-Fat Pumpkin Muffins

I have plenty of fat and sugar filled pumpkin recipes that are so good, but not so great for the waistline.
When I am feeling like serving a guilt-free muffin I go to this recipe!
These muffins are very good and satisfy any pumpkin craving you might be having.
They also bake up really pretty,
and feel your house with a yummy pumpkin spice aroma.


Low-Fat Pumpkin Muffins

-Non-stick Cooking Spray (I like to use Pam Spray)
-2 cups flour (all-purpose OR White-Wheat four I wouldn't use whole wheat flour that would make the muffins to dense)
-
Tablespoon baking powder
-1 tsp table salt
-1 tsp baking soda
-1/2 tsp ground cloves
-1 tsp ground cinnamon
-1 tsp ground nutmeg
-2/3 cup unsweetened OR natural applesauce
-1 cup canned pumpkin
-2/3 cup sugar
-1/2 cup fat-free egg substitute
-2/3 cup fat-free milk
-powdered sugar, for making the tops look pretty

1. Preheat oven to 400 degrees. Coat a 12 hole muffin tin with cooking spray. If you are using cupcake liners, do not spray the pan but pray very lightly the insides of the cupcake liner.

2. Combine flour, baking powder, salt, baking soda, cloves, cinnamon and nutmeg in a large bowl.

3. In a mixer combine applesauce, pumpkin, sugar, egg substitute, and milk in a medium bowl; mix thoroughly with a wooden spoon.

4. Stir the flour mixture into the applesauce mixer until it is all completely incorporated-do not over mix!

5. Pour batter into muffin tins. Bake for 20 to 25 minutes, or until a tester inserted into the center of a muffin comes out clean.

6. Let cool for about 10 minutes. sprinkle on the Powdered sugar (I used a flour sifter).

Enjoy!
-

Friday, October 2, 2009

Banana Cinnamon Chip Muffins

These delicious muffins are perfect way
to use up those overripe bananas you may have sitting in your kitchen.
I made them the other night to go with some soup for dinner,
my family loved them!
They also made for a perfect side for breakfast the next morning.
When these muffins are baking, they bring in a wonderful and yummy fall scent!


Banana Cinnamon Chip Muffins
adapted from Bake at 350

1/2 c unsalted butter
1 c sugar
1 egg
1/2 tsp ground allspice
1/4 tsp ground nutmeg
2 mashed, ripe bananas (about 4 bananas)
1/3 c milk
2 c flour (white-whole wheat, unbleached all-purpose, or a mix)
1 & 1/2 tsp baking powder
1 & 1/2 tsp baking soda
1 tsp salt
3/4 c. cinnamon chips (I used the Hershey's brand, found in the baking section with the chocolate chips)


Preheat the oven to 350.

Line muffin tins with 12 lightly greased baking cups/liners. (I use Pam spray)

Whisk together the flour, baking powder, baking soda and salt. Set aside.

Cream together the butter and sugar until smooth and fluffy. Scrape down the bowl. Add the egg, spices, banana and milk. Stir in the dry mixture, then the cinnamon chips (reserve a few TBSP of chips). Once all the cups are filled, sprinkle the reserved chips on top.

Spoon batter into the prepared cups. Bake for 20 minutes or until a toothpick inserted in the middle come out clean. Let cool for 10 minutes on a cooling rack, then invert out of the pan to cool completely or serve warm.

Enjoy!